Tasty and Easy Plum Jam for the Winter – One Wonderful Recipe

Print Recipe
Of course, jam for every taste can be purchased at the supermarket, but how can it be compared with home-made jam? Fragrant, with an amazing taste, pitted plum jam is prepared very simply and quickly. Cane sugar gives a caramel flavor to the finished jam, if desired, you can completely replace white sugar with brown and vice versa.
But it doesn’t hurt to learn some cooking secrets.
Jars preparation
Despite the fact that sugar is a very strong preservative that allows a sweet dessert to stand perfectly all winter even in a city apartment, it is imperative to sterilize the jars.
Glass containers should be washed well without the use of detergents. Instead, you should use soda, which will dissolve dirt and disinfect the surface. There are three ways to sterilize dishes:
- In the oven: on a wire rack for 15-10 minutes at 100 degrees. The time depends on the size of the container.
- Over steam: sterilization takes place over the spout of a boiling kettle or on a special round pot attachment. Time 5-7 minutes.
- In the microwave: pour some water into the container and turn on the microwave at full power. Once all the water has boiled away, the process is complete.
How to pour Plum jam into jars
In addition, there are other points that need to be taken into account so that the jars do not swell, do not explode, and mold does not appear in them. Let’s start with how to properly pour jam into a jar.
When packaging hot jam in already cold jars, the glass can burst from a sharp temperature drop.Therefore, you need to use either still hot jars, or keep an ordinary spoon in the container when pouring (the metal will take all the heat on itself).
With a cold packaging method, it is worth sterilizing the filled jars additionally (in a saucepan with water for 30 minutes).
Lids for jars
Be sure to pay attention to the covers. Before clogging, they must be boiled or poured over with boiling water (depending on the type). You can use:
- Tin – are inexpensive, airtight, but short-lived. It is not advisable to store such preservation for more than a year, because the products may acquire a metallic taste.
- Reusable screw twist-offs – suitable for any conservation, resistant to citric acid, can be used up to 3-4 times.
- Reusable vacuums are the best option, but the downside is that you need a special wrench. And the price of this pleasure is significantly different.
- Nylon – suitable only for short-term storage in a cold cellar or in the fridge.
Banks closed with a nylon lid should not be rearranged in warm places or the temperature changes sharply, as condensation will form, due to which mold will appear in the future.
After seaming, the jar should be turned over and check if air is passing through the lid. Before cooling, the filled container is best left upside down. For additional sterilization, you can insulate from above with a blanket, towel.
An unequivocal answer to the question “what kind of lids is best to close the jam?” and “which method of sterilization to choose?” does not exist. Each lid and sterilization method has its own advantages and disadvantages. You need to choose only based on your capabilities and preferences.
Ingredients
- Add to Shopping List +
- Add to Shopping List +
- Add to Shopping List +
- Add to Shopping List +
Nutrients
Calories
168.59
168.59
Carbohydrates
41.67
41.67
Fat
0.12
0.12
Protein
0.5
0.5
Step by step method
-
Step 1
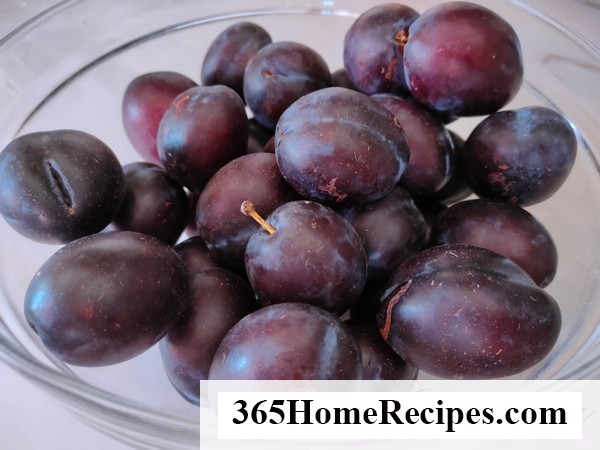
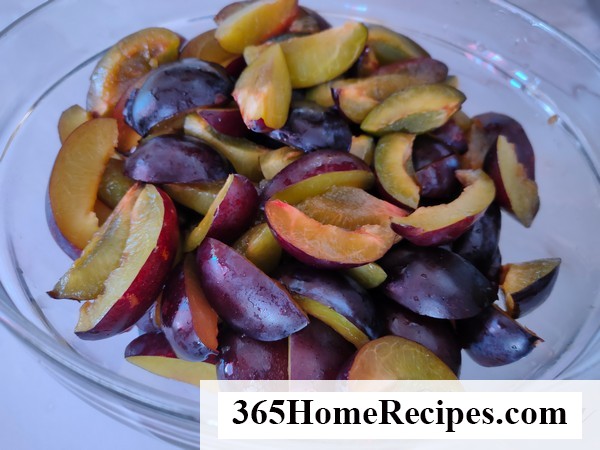
Wash the plums well, remove the tails, let dry to remove excess liquid.
-
Step 2
We remove the bones. Each half can be cut into several more pieces if you do not like large pieces, or left as is.
-
Step 3
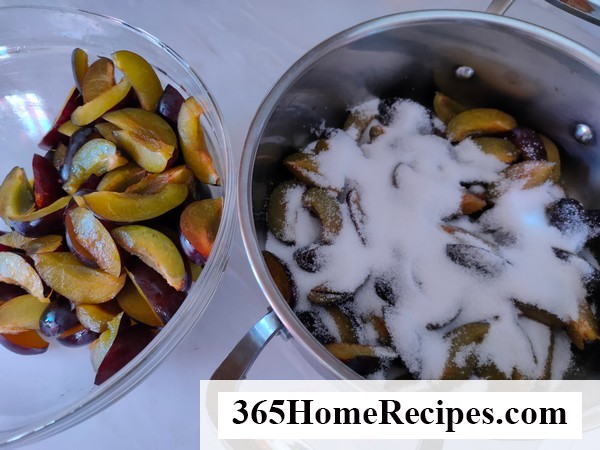
We spread the prepared plums in a large container, sprinkling each layer with white sugar.
-

Step 4
We cover the container with a towel or lid and leave until the juice is released for several hours.
-
Step 5
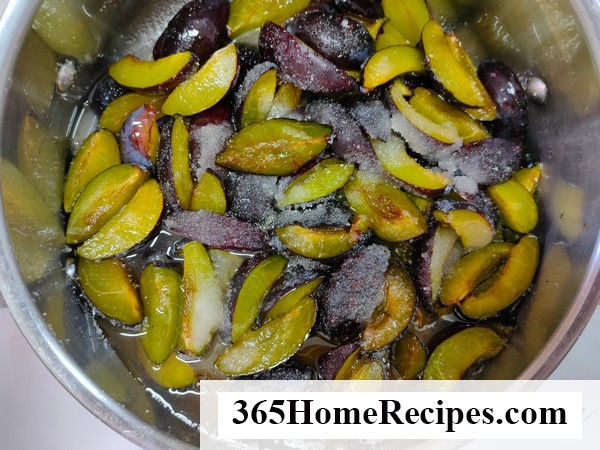
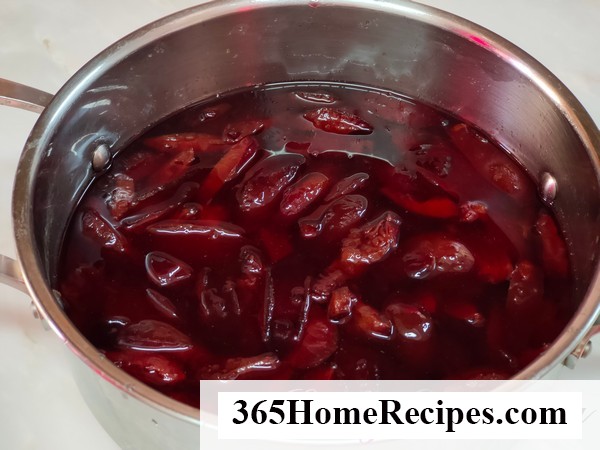
When enough liquid appears in the pan, put on the stove and cook at a minimum heat from the moment of boiling for about 5 minutes.
-
Step 6
Remove from heat and leave until the next day if cooked in the evening. That is, you need to withstand approximately 12 hours before the next brew.
-
Step 7
The second time, boil the jam with minimal heat for 15 minutes (do not forget to remove the foam from the surface).
-
Step 8
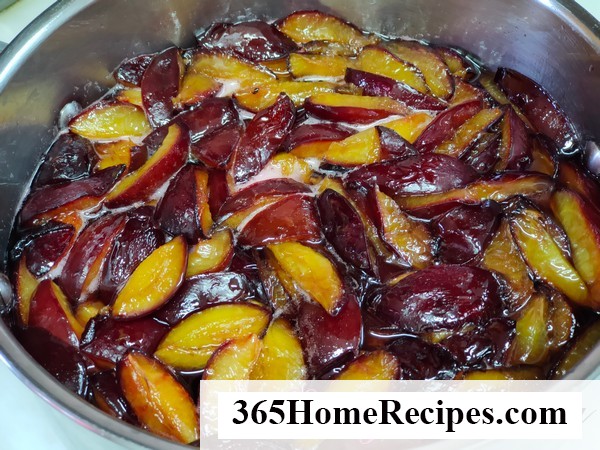
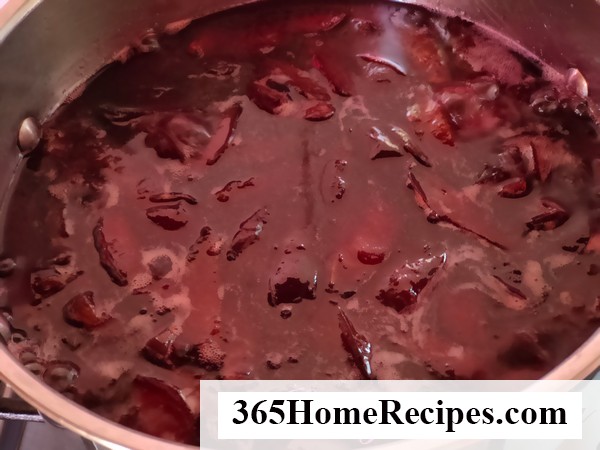
We leave for 12 more hours. At the third cooking, we increase the heat (boiling should be a little more active) and cook for 20 minutes.
-

Step 9
After the time has elapsed, add lemon juice and immediately turn off the heat.
-
Step 10
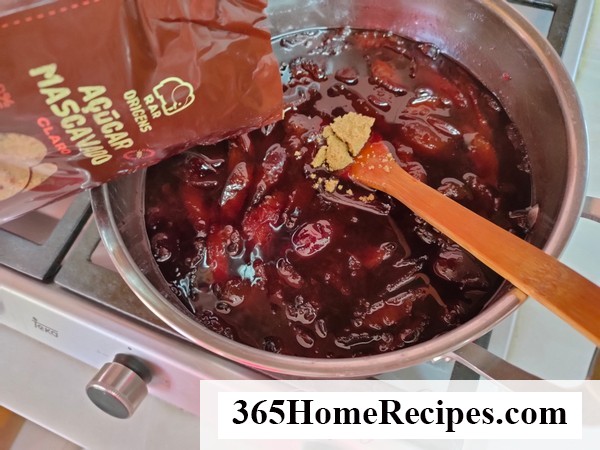
Now pour in the cane sugar and mix very vigorously with a wooden spatula until it dissolves. When stirring, it is good to feel how the syrup thickens.
-

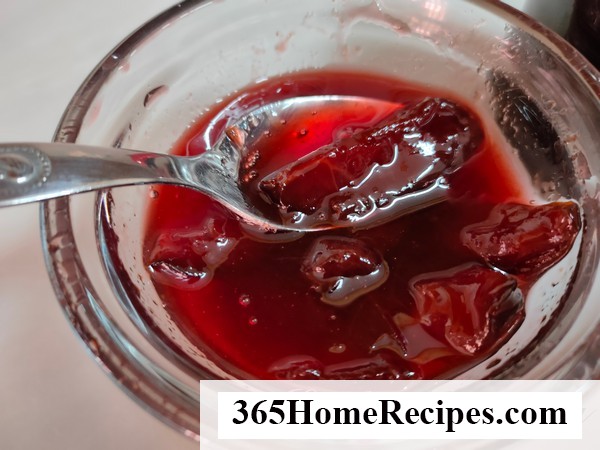
Step 11
To enrich the taste at this stage, you can add any toasted nuts or pieces of dark chocolate. Plum jam is ready! We pack it in hot sterilized jars and close the lids. You can store at room temperature.